How To Add Back And Forward Buttons To Outlook Ribbon?
With the Back and Forward buttons in Outlook, you can quickly switch among views you have opened before. As these two buttons are not displayed in Outlook ribbon, in this tutorial, we will show you how to add Back and Forward buttons to Outlook ribbon.
 Add Back And Forward Buttons To Outlook 2013
If you are using Outlook 2013, you can do as follows to add the back and forward button to the ribbon.
1. Click the Customize Quick Access Toolbar button  in the ribbon, and then click More Commands in the drop-down list. See screenshot:
in the ribbon, and then click More Commands in the drop-down list. See screenshot: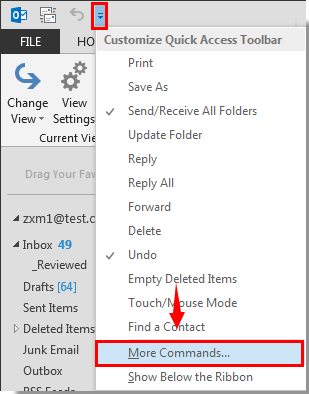
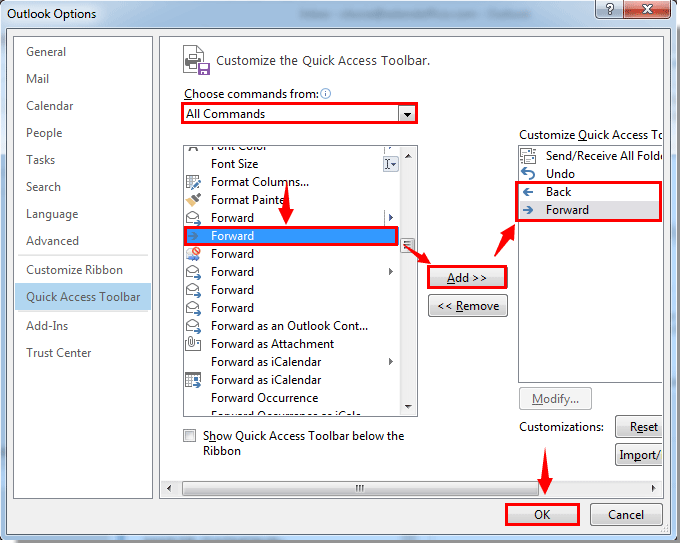
2. In the Outlook Options dialog box, you need to:
1). Select All Commands in the Choose commands from drop-down list;
2). Scroll down to find and select Back in the commands box, then click the Add button;
3). Find and select the Forward which has a right arrow icon before it in the commands box, then click the Add button;
4). Click the OK button. See screenshot:
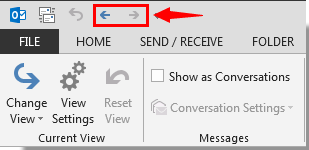
Then the Back and Forward buttons are added to Outlook ribbon.
Add Back And Forward Buttons To Outlook 2010
In Outlook 2010, you can add the Back and Forward buttons to ribbon as follows.
1. Click the button in the ribbon, check the Back option in the drop-down menu to add it to the ribbon. And repeat the operation to add the Forward button. See screenshot:
button in the ribbon, check the Back option in the drop-down menu to add it to the ribbon. And repeat the operation to add the Forward button. See screenshot: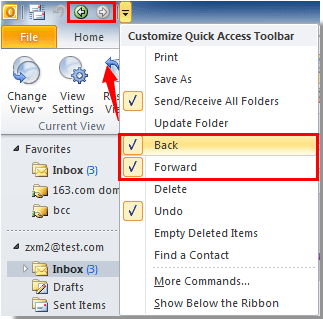
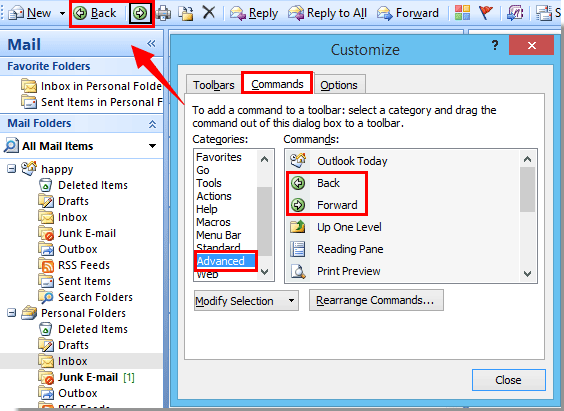
Add Back And Forward Buttons To Outlook 2007
1. In Outlook 2007, click the button in the ribbon, then click Add or Remove Buttons > Customize. See screenshot:
button in the ribbon, then click Add or Remove Buttons > Customize. See screenshot:
2. When the Customize dialog box pops up, please do as follows.
1). Click the Commands tab;
2). Select Advanced in the Categories box;
3). Select and drag the Back and Forward buttons separately from the Commands list box to the ribbon;
4). Close the Customize dialog box. See screenshot:
No comments:
Post a Comment